I've never been a huge fan of pavlova, especially the bought variety. They're usually too hard, crunchy and dense like solid sugar... Not my cup of tea at all. But this is a different kettle of fish altogether. The meringue is soft and light and melts in the mouth. The finished pav is pretty easy on the eye as well.
This is a Valli Little recipe from the November 2010 edition of Delicious Magazine....and as usual, I altered it ever so slightly to suit my taste and oven.
Ingredients:
1/2 cup brown sugar (firmly packed)
1 cup caster sugar
1 1/2 tablespoons cornflour
6 egg whites
1 1/2 teaspoons vanilla extract
2 teaspoons white vinegar
500 grams mixed berries (frozen is OK as long as they're thawed)
300 ml thickened cream
200 ml sour cream
Method:
Preheat the oven to 120 Celsius
Grease and line the bottom of three 24cm cake pans and then grease again.
Place the brown sugar, cornflour and caster sugar in a bowl or food processor and whisk or whizz it so it's all combined and there are no lumps.
In a bowl, beat the egg whites with a pinch of salt until soft peaks form then, while the motor's still running, gradually add the sugar and cornflour mixture, a spoonful at a time, mixing until stiff and glossy. It shouldn't take long.
Fold in the vanilla and vinegar, then divide the mix between the three cake pans and put in the oven and bake for 50-55 minutes. Then switch off the oven, open the door a little and let it cool completely.
For the berries: Place 1/2 cup of sugar and 1/2 cup of water in a small saucepan and stir over low heat until the sugar has dissolved and it's reduced a little. Once it's cooled down add the berries, swirl them around and then mash them a little with a potato masher or fork until some of their juice combines with the sugar syrup.
Whip the cream and sour cream together, then just before serving, place the first meringue on a cake stand or plate, spread some cream over it then pour some of the berry mix on top. Repeat with the next layer and the next. Place some fresh berries on top, pour the syrup mix over the top and there you have it.
Do not assemble this beauty until you're ready to serve it as it will become a rather large sloppy, soggy mess...that's how light the meringue is.
As I mentioned earlier, this is a Valli Little recipe from Delicious Magazine. But one day, when I couldn't find the mag to check on ingredients, I did an online search and found an identical recipe (three layer berry and brown sugar pavlova) with almost identical photograph at Epicurious.com. Not sure who developed it first, but hey, it's absolutely luscious no matter who it was.
ENJOY ! ! ! !
Showing posts with label dessert. Show all posts
Wednesday, December 22, 2010
Monday, December 20, 2010
Christmas Menu 2010 #1 - Cheesecake
This is a white chocolate and berry cheesecake that featured in the June 2008 Edition of Super Food Ideas....It's also on Taste.com.au. It's a simple recipe that delivers in taste and presentation.
In other words: looks good, tastes yum!.
Ingredients:
12 cottage Cookies with macadamia
300 gr frozen mixed berries
2 tablespoons boiling water
3 1/2 teaspoons powdered gelatine
180 gr white chocolate, chopped
500 gr cream cheese, softened
1/3 cup caster sugar
185 ml can evaporated milk
Line the base of a 22cm round springform pan with baking paper and arrange the biscuits in a single layer over the base of the pan. Top with half the berries and let sit. Place the boiling water in a small heatproof jug and sprinkle the gelatine over the top then whisk with a fork until it's dissolved
Place the chocolate in a heatproof bowl or jug and microwave on high for a minute or two, stirring every 30 seconds until melted and smooth, then set aside.
Beat the cream cheese, sugar and vanilla until smooth, gradually beat in the evaporated milk, chocolate and gelatine, then pour the mixture on top of the biscuit base.
Scatter the rest of the berries on top, cover and refrigerate overnight.
That's it ! All that's left to do is eat and enjoy!!
In other words: looks good, tastes yum!.
Ingredients:
12 cottage Cookies with macadamia
300 gr frozen mixed berries
2 tablespoons boiling water
3 1/2 teaspoons powdered gelatine
180 gr white chocolate, chopped
500 gr cream cheese, softened
1/3 cup caster sugar
185 ml can evaporated milk
Line the base of a 22cm round springform pan with baking paper and arrange the biscuits in a single layer over the base of the pan. Top with half the berries and let sit. Place the boiling water in a small heatproof jug and sprinkle the gelatine over the top then whisk with a fork until it's dissolved
Place the chocolate in a heatproof bowl or jug and microwave on high for a minute or two, stirring every 30 seconds until melted and smooth, then set aside.
Beat the cream cheese, sugar and vanilla until smooth, gradually beat in the evaporated milk, chocolate and gelatine, then pour the mixture on top of the biscuit base.
Scatter the rest of the berries on top, cover and refrigerate overnight.
Friday, July 23, 2010
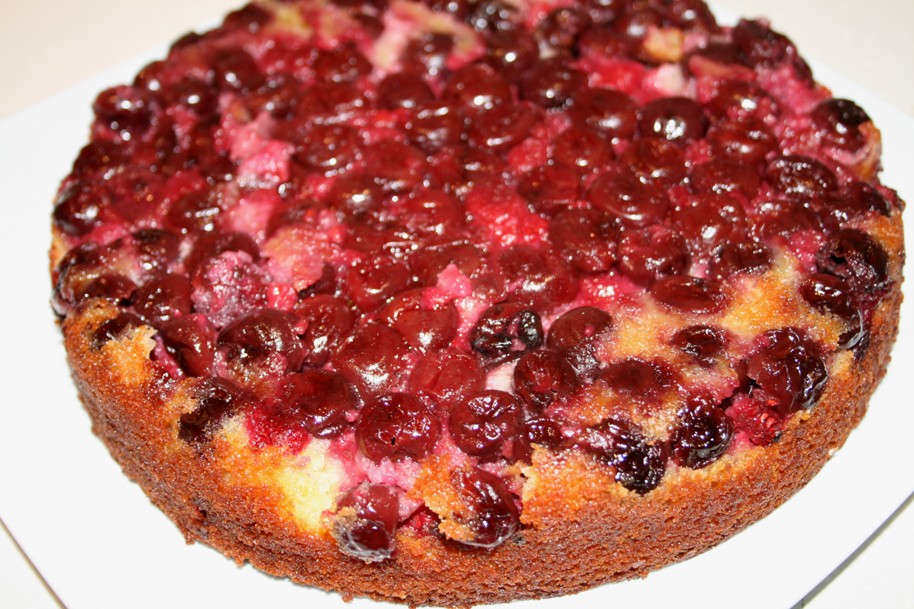
Upside Down Cherry and Raspberry Pudding
This is a recipe I found on Taste.com when I was looking for something easy to make and easy to carry to a dinner party we were going to recently.
I tweaked it a little though...adding some raspberries and yogurt to the mix.
It's a cake but also a pudding and delicious served with cream, custard or ice-cream...also scrumptious cold with a coffee in the afternoon.
You'll need:
-------------
1 680gr jar pitted cherries
1 cup frozen or fresh raspberries
125 grams butter, softened
2/3 cup caster sugar
2 eggs at room temperature
1/2 cup self raising flour
1/4 cup almond meal
large dollop of yogurt
cream, custard or ice cream to serve
Preheat oven to 180*c. Grease a 20cm, round cake pan and line it with baking paper.
Cream together the butter and sugar.
Place them and the raspberries in the bottom of the cake tin
Add the flour and almond meal to the cake mixture and fold through, then add a large dollop of yogurt and fold it through.
Carefully spoon the cake mix over the berries and bake for 35 to 40 minutes....
Now, a word of warning. You need to let this sit in the tin for about 5 minutes to let it settle before turning out onto a wire rack or plate. You also need to insert a spatula or knife down the sides of the cake to help ease it away from the sides of the tin, otherwise you'll end up with a broken mess when turning it out onto the plate.
That's it...eat and enjoy!
Sunday, October 18, 2009
Custard Apple Pie
Stacey Snacks has some great recipes to try out. The other day I saw her Custard Apple Pie and thought I'd give it a go...and she was right. It was easy and delicious!
I used two sheets of short crust pastry, I sprinkled about a teaspoon of sugar on one and laid the other over the top so I'd have more coverage of the pie dish.
Peel and quarter four apples. I used Granny Smith's because we like their tartness. Then slice the quarters into three and lay half of them in the bottom of the pie dish
Combine half a cup of sugar and some cinnamon in a bowl.
Sprinkle the first layer of apples with half the sugar mix, then pour half the custard liquid over the top, then lay the rest of the apples in the dish, sprinkle them with the rest of the sugar and cinnamon and pour the rest of the custard over the top.Dot the top with a few small knobs of butter.
Then bake in a 220c preheated oven for 10 minutes, before turning the oven down to about 180 and bake for another 40 minutes.
Friday, September 4, 2009
Ice Cream
I've never been a real sweet tooth...my taste leans more towards fat and salt...you could say I have a "fat tooth". But last Christmas, we were having the whole family over for dinner so I decided to make some ice-cream from scratch....and it turned out rather well.
The first ice cream flavour I made was a coconut and vanilla ...and since that first attempt, I've made it several times more with varying amounts of coconut.
The process looks complicated and lengthy....but it isn't really. Ice cream is just frozen custard, so just think of it as making custard and you'll be right.
Here's what I did for the latest version I made.
You'll need
--------------
8 egg yolks
3/4 cup caster sugarYou'll need
--------------
8 egg yolks
600ml cream
600ml full cream milk
200ml coconut cream
vanilla bean
2 tsp vanilla extract
extra 300ml cream
Split the vanilla bean and scrape out the tiny black seeds. Place the milk, cream, coconut cream and the vanilla seeds in a saucepan and bring to the boil, then let simmer for a minute. Take off the heat
Place egg yolks, sugar and vanilla extract in a bowl and mix until it's thick and creamy and the sugar has dissolved.
Gradually, very gradually, add the hot milk to the egg mixture and mix until well combined, then place it all back in the saucepan and stir constantly over a low heat for about 7 minutes until it's thickened slightly.....Please do not overcook this as it will end up looking a little like fine scrambled eggs and that's definitely not what you want. Be patient with this step. It'll be worth it.
Once it's thick enough to coat the back of a wooden spoon or silicone spatula, transfer it back to the mixing bowl and add the extra cream and mix until combined.
Then put it all in the fridge to let it cool down completely.
The next step....if you have an ice-cream maker, just follow the instructions. If you don't, place the mixture in a wide bowl and put it in the freezer until the edges start to freeze. Then beat for 2 to 3 minutes until smooth and return it to the freezer. Repeat this step a few more times until the mix is aerated and thick and then leave it in the fridge until frozen
That's it.
Just a note: If you taste the custard at the start and think it's too sweet, don't worry, the freezing process diminishes the sweetness.
Place egg yolks, sugar and vanilla extract in a bowl and mix until it's thick and creamy and the sugar has dissolved.
Gradually, very gradually, add the hot milk to the egg mixture and mix until well combined, then place it all back in the saucepan and stir constantly over a low heat for about 7 minutes until it's thickened slightly.....Please do not overcook this as it will end up looking a little like fine scrambled eggs and that's definitely not what you want. Be patient with this step. It'll be worth it.
Once it's thick enough to coat the back of a wooden spoon or silicone spatula, transfer it back to the mixing bowl and add the extra cream and mix until combined.
Then put it all in the fridge to let it cool down completely.
The next step....if you have an ice-cream maker, just follow the instructions. If you don't, place the mixture in a wide bowl and put it in the freezer until the edges start to freeze. Then beat for 2 to 3 minutes until smooth and return it to the freezer. Repeat this step a few more times until the mix is aerated and thick and then leave it in the fridge until frozen
That's it.
Just a note: If you taste the custard at the start and think it's too sweet, don't worry, the freezing process diminishes the sweetness.
... and don't worry about what to do with all the left over egg whites. I have a great recipe to use them up and it isn't a PAV ! !
Subscribe to:
Posts (Atom)